It's been a few days, but I'm back! Sorry I wasn't able to get this post up sooner, I didn't have any internet connection for a couple of days. This is a continuation of some of my favorite miniature things. If you want, you can read part 1here. Everything is pretty self-explanatory, but if you have any questions, feel free to leave them in the comments.
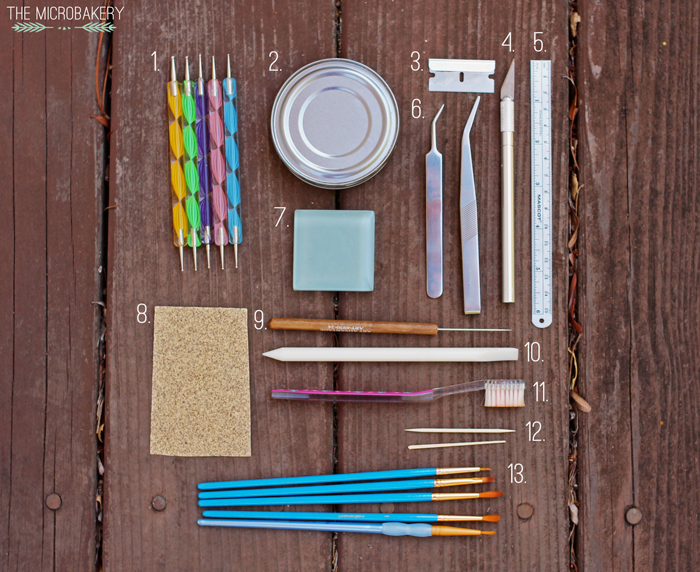
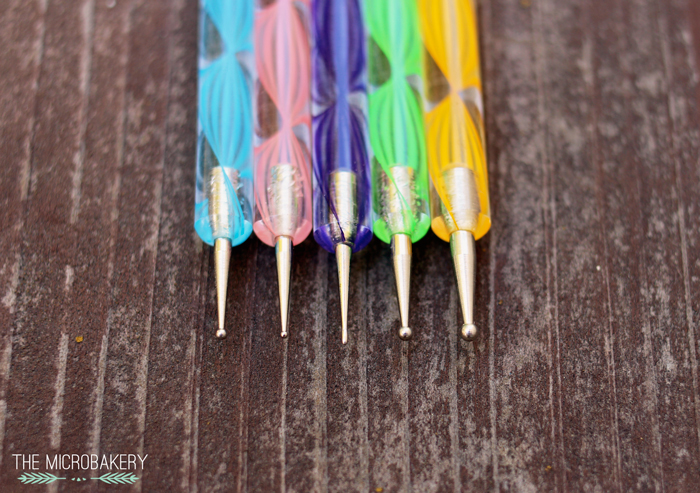
1. Dotting tools-- You'll notice most miniaturists use some sort of dotting tool to create their minis. They are incredibly versatile and helpful. You can find them for a low price on ebay or possibly a local beauty supply store. I recommend finding a set that has a rounded tip (like the purple tool in the middle), but if you only find sets with ball tips, you can just file one down to make a more pointed tip.
2. Can lids--I took this idea after seeing FatalPotato do this in several photos. Let me just say...it...is...life...changing. The clay sticks nicely onto the lid so it won't slip and slide. You'll be able to not only lift the clay, but put it in better angles where 1) you can see what you're doing better, and 2) allow your tools to reach certain areas better. You can even leave your piece on the lid and bake it!
3. Razor blades--Pretty self-explanatory, but I use razor blades to slice clay or scrape off some chalk pastel dust. Always use a sharp blade to make a clean slice through the clay.
4. X-acto knife--I use this the same way as the razor blades, but sometimes a miniature calls for different blades.
5. Ruler--Always have one handy to make sure things stay to scale.
6. Tweezers--I use two types of tweezers, one is a needle nose shape and the other a more dull nose shape. The needle nose are great for placement of items that need to be placed in a precise place.
7. Glass tile-- I use this exactly like I do with the can lids. However, I find the clay sticks better to the glass than the metal.
8. Sand paper--great for adding texture. I suggest using a more fine grit, otherwise it will leave indentations that are too big and out of scale to your piece.
9. Needle tool--I use this all the time for creating the "fluffy" cake-like texture on things. Like the dotting tools, you can easily find this on ebay. But, it's not completely necessary to buy one. You can always get a sewing needle and bake on a clay handle.
10. Clay shaper--This plastic tool comes in handy once in a while. One end is a dull-ended cone-shaped point and the other side has a curved taper end. I believe I got this one from Blick Art.
11. Soft toothbrush--Great for texturing, just like sandpaper. I prefer to use softer more dense bristle as it gives a different texture effect than a more stiff bristle.
12. Toothpicks--Always handy for anything from texturing to clay shaping. I like using two different kinds, one with a pointed sharp end, and one with a dull flat end.
13. Paint brushes--To add acrylic paint or chalk pastels to clay.


No comments:
Post a Comment